Marnie from Horris and Deedle teaches us how to put our BOO! scraps to good use!
Ah - the 80s...perms, teased fringes, massive shoulder pads, hypercolour t-shirts, Wham!, parachute pants, bumbag, hairspray, legwarmers, all things neon...and SCRUNCHIES! It is true that some things should never be seen again, such as the teased fringe (definitely not Wham! though, fan for life here) but if you’ve been resisting the revival of these beauties, resist no longer and embrace another scrap buster for all your precious BOO! offcuts you’ve been hoarding.

It’s time to embrace DIY scrunchies
DIY scrunchies are all the rage again at the moment - seen on the arms of teenage girls, and in the hair at the schoolyard. Best of all, it’s simple to make a scrunchie, and if you have a kid in your house who is learning to sew, they are something they should be able to tackle without too much help from you.
An easy scrunchie tutorial
I’m going to take you through two different methods to sew these up, but they all start with the same things. Cut strips of Boo Spandex approximately 56cm (22") long x 8cm (3 1/4") wide. You will also need elastic approximately 20cm (8") long. I prefer to use 6mm (1/4") to 10mm (5/8") elastic as it stretches more, but you can use either.

METHOD 1 to make a scrunchie
Take your strip of fabric and fold lengthwise, right sides together. Sew down the full length of the fabric. Leaving the short edges unsewn.

Turn right side out. Take your elastic and thread it through the tube of fabric. I use a safety pin to do this. You need to have the elastic hanging out at either end so be sure not to just pull it all the way through.

Grab the ends of the elastic and pull around to form a circle. Sew ends together.


Fold one short end of spandex in under on itself to hide the raw edge. Insert the other end and pin.

Stitch close to the folded edge to close your design and you are all done!

This is the easiest method to sew with, but I do find spandex a bit slippery for the folding and final sew, so for those of you who are with me, here is another method.
METHOD 2 to make a scrunchie
Take your strip of fabric and fold lengthwise, right sides together. Sew down the full length of the fabric but leave a gap of about 3cm at each end unsewn. The more experienced you are, the smaller the amount you will be able to leave at the edges unsewn.

Turn right sides out and you will now have a loop with an opening lengthwise at each end.

The next bit is a little tricky. Fold the fabric half to form a loop. You’ll want to fold it with the seam facing out. We are going to sew the short edges together. To do this you will need to go slowly and open out the fabric as you sew.


Next, take your elastic and thread through the gap and around the fabric loop, gathering the fabric as you pull the elastic ends together. Sew elastic ends together.

Finally, close the gap by sewing a small straight stitch down the side, over the opened portion, and you are all done.

Either of these methods works - it’s up to you how you prefer to sew it. Don’t they look pretty all sewn up.

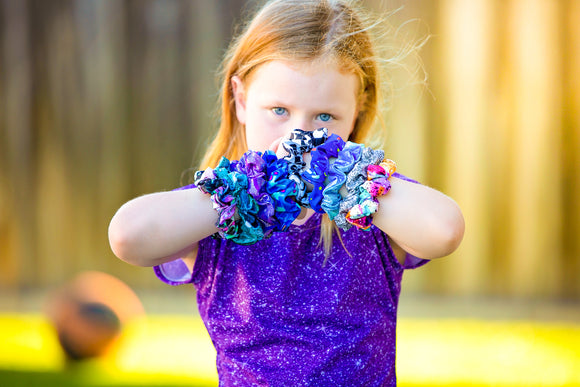
According to my daughter they make for great bracelets...and scrunchies on a headband look good to….oh dear!


Thanks for reading along and happy sewing! Go make those DIY scrunchies.
Marnie

Marcia Pugh
Thank you so much for this simple tutorial! I am going to be making all the scrunchies now!!! 😍
Kristy
Thank you so much for a easy pattern to do during the school holidays with kids.
Grace Anderson
Looks good and looks easy
Lynne
🤣 haha.. Takes me straight back to the 80’s when my daughter seemed to think she needed to wear at least 6 scrunchies at a time on her ponytail. Ahh the good old 80’s !